Wednesday, June 5, 2013

POZOLE ROJO


Pozole is a pre-hispanic dish which has numerous preparations depending on it’s region of origin, but the beautiful flower shaped hominy is essential for any and all. A good pozole is a nourishing broth, brimming with flavour and crunchy with fresh vegetables. Traditionally made with a whole pig head cooked for half a day, this is uses ribs to give the broth body and is one of the more manageable versions that you can make at home.

Ingredients


500 g pork shoulder
500 g pork ribs
3 Litres water
2 heads of garlic, halved
1 onion, peeled and halved
1 bay leaf
1 tbsp Mexican oregano
1 tbsp salt
6 guajillo chillies, stems and seeds removed
500 g tinned hominy, drained and rinsed

To Serve


½ head iceberg lettuce, chopped
6 radishes, finely sliced
½ white onion, finely chopped
2 limes, halved
pequin chilli powder
1 packet tostadas

Method


Place the pork shoulder and ribs in a 4 litre pot and add the water. Bring to a simmer, skim off any scum that rises, add the garlic, onion, bay leaf, oregano and salt. Simmer for 2 hours or until the ribs are tender and can be pulled from the bone. By then, the liquid should have reduced to around half.

When ready, remove the meat from the ribs and shred by hand when cool. Discard the bones and shred the shoulder pieces too. Reserve. Strain the stock and discard the vegetables and spices.

Cover the guajillo chillies with hot water in a non-reactive bowl and leave to soften for 10 minutes. Drain, then place the chillies in a blender jar with 2 cups of the broth and puree until very fine. Strain the mixture into the broth and add the hominy. Place in 25 cm pot and bring to a simmer. Cook for 30 minutes, or until the hominy swells and softens.

Add the pork, check the seasoning and serve with the accompaniments of shredded lettuce, sliced radish, chopped onion, lime wedges and chilli powder for each person to add to their tastes. Tostadas should be served at the table.

Saturday, April 6, 2013

On the move, on the web

Flying in to the Copper Canyon in a Cesna, Chihuahua, Mex

I'm back on the road in Mexico, two years after leaving and six years after my first visit, on my most intrepid tour yet. I managed to score a spot as food advisor on an upcoming series on Mexican food, so I am going places I never could have gone on my own, meeting new people and of course eating amazing new food.

If you are so inclined, join me here and on instagram (click over to the right) to see some fascinating food and people over the next few months.


Rarámuri Easter celebrations, Batopilas, Mex.


Tuesday, February 5, 2013

Bistec a la Mexicana

 The official Mexican Flag
My much tastier version of the flag, which only took 5 minutes. You decide which is better.

You would think that a dish that bares your country's name would be up there with the best, but as you can see from above it is more symbolism than definition at work here. Bistec a la Mexicana certainly does its best to demonstrate the diversity of Mexico, since it is hard to see it made the same way twice with omissions and additions of ingredients common throughout cookbooks, restaurants and even our faithful old friend, the internet. 

As such, I don't make any claims that this particular recipe is the one they ate the day they dreamt up the flag, or even that it is the best one out. But it is a good one and, more importantly I have covered a few things that I found sorely missing from quite a few recipes around such as the best cut to use, how to cook it for tenderness and best results. All covered below. Please hit me with any questions on the comments section, I am here to help you know.


Bistec a la Mexicana 
Nationalistic Beef

350g rump steak
2 tablspn oil 
1 heaped teaspoon sea salt, less for normal salt
300g tomato, boiled, cooled and peeled then chopped roughly
1 green Capsicum (aka bell pepper), sliced
1/2 white onion, sliced
1 clove garlic, chopped
4 shallots (scallions)
1 Jalapeño chile, sliced into strips (seeds optional)
chopped coriander


  1. Slice the beef rump into strips, 3cm long and about 3mm thick.* Place in a bowl with the chopped shallots, sea salt and oil and mix well with your hands. cover and let sit for 20 mins to an hour.
  2. Get a 25cm pan really hot, then add the beef (it should be room temperature so as not to cool the pan down too much) and basically stir fry for about 2 minutes until there is no pink surface. The beef should still be tender but cooked to at least rare. Remove to a bowl. 
  3. Add a little bit of oil then the onion, garlic, chile and green pepper. Lower the heat and cook for about 5 minutes of stirring, letting the vegetables soften. Add the chopped tomato. 
  4. After it softens and takes on a saucy consistency (add a splash of water if required), introduce all the beef and liquid that has come out of it. Check seasoning, add coriander and serve. Provecho. 


Notes

 *Rump steak is a tasty cut that will remain tender if not over cooked.**

Notes on notes

**Do not overcook the rump steak.


Friday, February 1, 2013

Huevos Rancheros

Ingredients

300 g roma tomato
½ small white onion
1 clove garlic
1 small green chilli
salt, to taste
1 cup vegetable oil
8 corn tortillas
8 eggs


Method


  1. Place the tomato, onion, garlic and chilli in a blender jug and puree until smooth.
  2. Heat a 25 cm fry pan to a medium heat and add two tablespoons of the oil. Fry the sauce for 3-4 minutes or until it begins to thicken, add salt to taste then reserve.
  3. Heat the remaining oil in a 30 cm frypan to a medium heat, then fry the tortillas until crispy. Drain on paper towelling then repeat until all are cooked.
  4. Drain all but 2 two tablespoons of oil into a heat proof bowl, the use the pan to fry the eggs on a medium heat until the whites are firm but the yolks remain runny.
  5. To serve, place two fried tortillas on each plate, top each with a fried egg then add the cooked tomato sauce over the whites, leaving the yolks exposed. Serve immediately.

Friday, January 11, 2013

Helado de Cajeta y Nuez


If you are not familiar with cajeta, the moreish, delicate and intriguing caramel made from goat's milk then this is a great way to get acquainted. Made by reducing goats milk with sugar until it caramelises, it is a more sophisticated version of the famed dulce de leche and is ubiquitous in Mexico where it may appear in the form of a paste on bread (something like nutella), a hardened candy lollypop or the ice cream as below. 

It is such a distinct flavour, and takes me back to the Mercado 20 de Noviembre in Oaxaca where the helado stand always beckoned. This recipe has undergone a few incarnations, as I have tried to balance out the sour cream and milk to replicate somewhat the qualities of Mexican (or at least Oaxacan) milk, which is more complex and sour than Australian milk. Also I have settled on using store bought cajeta (though you can make your own), mainly because the concentration of sugar in frozen desserts must be quite precise to stabalise at a good consistency.


Helado de Cajeta y Nuez
Goat’s milk caramel and pecan ice-cream

2 cups milk
1 cup sour cream
300g cajeta
8 egg yolk
pinch of salt
2 tspn good vanilla essence
1 cup chopped pecans

1.    Bring the milk to the boil in a small sauce pan.
2.    Add the vanilla and salt.
3.    Whisk the egg yolks until frothy then pour in half of the hot milk, mix through then return to the pan.
4.    Cook on a low heat until the mixture coats the back of a spoon. Pour into a bowl and add the sour cream and cajeta and mix through.
5.    Chill until mixture is at fridge temperature, then churn as per the instructions of your  ice-cream machine (the kitchenaid I used takes around 20 minutes). When almost fully set, add the pecans and decant into a chilled container. Freeze. Best served within 48 hours.


Thursday, January 10, 2013

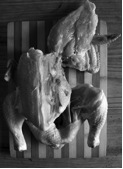
How to Joint a Chicken

All going to plan, over the next month or two I will be posting recipes from classes I have been ttaught over the past year. In that time I have had the opportunity to cover quite a bit of ground, so will start including a few more instructional "cheffy" things which I hope you will find useful. Something here today that covers an ingredient quite commonly used in Mexico, the bird.

The idea of butchery and knife skills to me, is to be able to control the produce you buy and use as you become less reliant on others to prepare it. There is also something quite satisfying about doing this sort of thing, learning the anatomy of a bird or fish and seeing the animal as a whole which I think is an important cognitive experience for any serious cook.

This basic breakdown will render the bird broken down into two breasts, two wings, two marylands and a carcass for stock. You could continue the process to yield two drumsticks and thighs separated out, but I didn't think of that when I was doing it so no photos of that step I'm afraid.

Let's get to it.

How to Joint a Bird

 
1. Place the whole chicken on a clean board with the tail end facing toward you.
2. Make an incision one side of the breastbone cartilage, starting at the neck. In one motion, cut down towards the tail keeping the knife following -and guided by- the breastbone.   
3. Use the knife to separate the breast meat from the rib-cage. Gently push the meat away with your other hand to give a better view of where you are cutting, and leave as little meat as possible on the carcass. 
4. Continue cutting and folding the breast, and eventually only the shoulder joint will hold the breast on. Fold the breast back to give a clear view. 
5. Push the tip of your knife into the joint and it will separate easily. You are not cutting bone, only making a small incision through the cartilage. 
6. Flip the bird over and place your thumb on the hip joint. Pull the drumstick towards you until the joint pops out. You can now make a cut straight from the top of the maryland to the tail. Be sure to cut around and include the oyster. Repeat steps 1-6 on the other side of the chicken. 

A great recipe for Helado de Cajeta coming next week. Thanks as always for checking in.